Android Screen Recording: How to Record Your Screen
Android Screen Recording: The Ultimate Guide to Capturing Your Screen
Hey there, tech enthusiasts! Ever needed to show a friendexactlyhow to navigate a tricky app menu, or capture that epic gaming moment for posterity? Want to create tutorials, presentations, or even just document a bug to send to a developer? Of course,everyonehas! Screen recording on Android is your superpower for all of these things. It's like having a little movie studio right in your pocket, ready to capture all the action happening on your phone or tablet. It can seem intimidating with all the options and technical jargon, but trustus, it's easier than ordering a pizza online. Why struggle with confusing screenshots and lengthy text explanations when a video speaks a thousand words (and saves you a whole lot of typing!)? Stay tuned; by the end of this guide,you'llbe a screen recording ninja! We're going to exploreeverytrick in the book, so you can record like a pro.
Diving Deep into Android Screen Recording: How to Record Your Screen
Android screen recording is, at its heart, exactly what it sounds like: the ability to create a video recording ofeverythingthat's happening on your device's screen. Think of it as pointing a camera at your phone, but instead of filming theoutside, it's filming theinside. This isincrediblyuseful for a bunch of reasons. Need to show someone how to use a new app? Record yourself doing it! Found a weird glitch and want to report it to the developers? A screen recording iswaymore effective than a written description. Want to capture that glorious, game-winning moment in your favorite mobile game? Screen recording has you covered!
But here's the thing: while the basic idea is simple, theexecutioncan sometimes feel a little confusing. Different Android versions have different built-in capabilities, and there aretonsof third-party apps out there that promise to make screen recording easier (or offer extra features). Sifting through all of that can be a real headache.Wewant to make itcrystalclear. This guide will break downeverythingyou need to know, from using the built-in screen recorder (if your phone has one) to exploring some of the best third-party options.We'llalso cover important things like recording audio, adding annotations, and troubleshooting common problems.
The beauty of Android screen recording lies in its versatility. Imagineeffortlesslycreating a quick tutorial for your grandma on how to video call, or demonstrating a complex workflow in a business app to your colleagues. Think about the impact of easily documenting software bugs to improve your company's product development cycle. Maybe you're into mobile gaming; now you can share yourepicwins andhilariousfails with friends, or even create content for You Tube or Twitch. The possibilities are endless!
But beforeyoudive headfirst into the world of screen recording, it's essential to understand the basics. Not all Android devices are created equal. Some come with a built-in screen recorder, while others requireyouto download a third-party app. Understanding your device's capabilities is the first step to becoming a screen recording master. And that'sexactlywhat this guide is all about.Weare here to demystify the process, armyouwith the knowledgeyouneed, and helpyouchoose the right tools for the job.
So, grab your Android device, settle in, and get ready to unlock theamazingpower of screen recording.Wepromise, by the end of this article,you'llbe capturing your screen like a seasoned pro. Ready to learn how to turn your phone into a mini-movie studio? Let's get started!
Learn how to use Android screen recording to capture your phone's screen! This ultimate guide covers built-in tools, third-party apps, and advanced tips.
Exploring Built-in Android Screen Recording: How to Record Your Screen
One of thecoolestthings about modern Android versions (generally Android 11 and above) is the inclusion of a built-in screen recorder. This meansyoudon't necessarily need to download a separate app to start recording your screen!How awesome is that? However, the availability and specific features can vary depending on the manufacturer (Samsung, Google, Xiaomi, etc.) and the Android versionyou'rerunning.We'llgive you a general overview and some specific examples.
Accessing the Built-in Screen Recorder
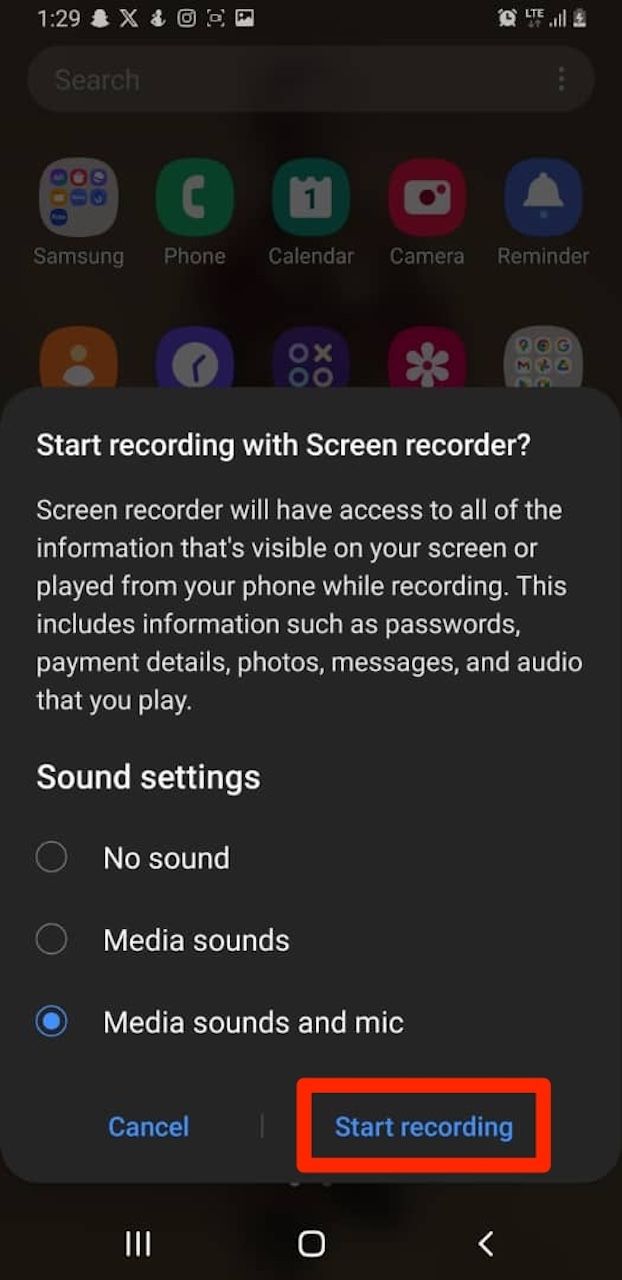
Typically, the built-in screen recorder can be accessed through the Quick Settings panel. This is the panelyousee whenyouswipe down from the top of your screen. Look for an icon labeled "Screen Recorder," "Record Screen," or something similar. Ifyoudon't see it right away,youmight need to edit your Quick Settings panel to add it. This usually involves tapping a pencil icon or a similar "edit" button within the Quick Settings panel itself. Onceyou'vefound the screen recorder icon, tapping it will usually initiate the recording process, sometimes with a brief countdown timer to giveyoua chance to prepare.
Swipe Down:Swipe down from the top of your screen to access the Quick Settings panel. Find the Icon: Look for "Screen Recorder," "Record Screen," or a similar icon. Edit if Necessary: Ifyoudon't see it, tap the edit icon (usually a pencil) to add it to your Quick Settings. Tap to Start: Tap the icon to start the screen recording.
Using the Native Screen Recorder Features
The built-in screen recorder usually comes with some basic butsuper usefulfeatures. For example,youcan often choose whether or not to record audio. This iscrucialifyou'recreating a tutorial and want to narrate whatyou'redoing.Youcan also typically choose whether to record audio from your microphone, the system audio (sounds coming from apps), or both. Another common feature is the ability to show screen taps. This highlights whereyou'retouching the screen, making it easier for viewers to follow along. Some devices also letyoudraw on the screen during recording, which can be great for emphasizing certain points.
Audio Recording: Choose to record audio from your microphone, system audio, or both. Show Screen Taps: Highlight screen taps to make it easier to follow along. Drawing Tools:Some devices allowyouto draw on the screen during recording.
Caveats and Limitations
While the built-in screen recorder issuper handy, it's not always the most feature-rich option. For example,youmight not be able to customize the video resolution or frame rate.Youalso might not have advanced editing tools or the ability to add a front-facing camera overlay (showing your face whileyou'rerecording the screen). Additionally, the built-in recorder might not be available on older Android versions or on devices from certain manufacturers. Ifyoufind that the built-in recorder is too limited for your needs, don't worry!We'llcover some excellent third-party apps in the next section.
Third-Party Screen Recording Apps: Taking it to the Next Level
If the built-in screen recorder doesn't quite cut it foryou, there's awhole worldof third-party screen recording apps waiting to be explored. These apps often offer more advanced features, customization options, and a wider range of editing tools.We'llhighlight a few popular choices and what makes them stand out.
Popular Choices and Their Strengths
AZ Screen Recorder: This is aclassicchoice and for good reason. It's packed with features, including the ability to record with different resolutions and frame rates, add a front-facing camera overlay, draw on the screen, and even trim your videos after recording. It also boasts a clean and intuitive interface, making it easy to use even for beginners.Plus, it's free (with a paid option to remove ads and unlock additional features).
XRecorder: XRecorder is another popular option known for its stability and reliability. It offers similar features to AZ Screen Recorder, including HD recording, facecam support, and editing tools.Oneof its strengths is its focus on simplicity and ease of use. It's a great choice ifyouwant a powerful screen recorder without a lot of unnecessary bells and whistles.
ADV Screen Recorder: This app stands out for its two recording engines: One using the 'Advanced Engine' which allows pausing and another which is the 'Basic Engine' which is simpler and sometimes resolves issues that the Advanced Engine can have on some devices. Also, this App allows the use of two cameras while recording.It'snot as feature-rich as some of the other options, but it's a solid choice ifyou'relooking for something simple and reliable.
Feature Comparison
Here's a quick comparison of some key features offered by these apps:
| Feature | AZ Screen Recorder | XRecorder | ADV Screen Recorder |
|---|---|---|---|
| ------------------- | ------------------ | --------- | ------------------- |
| HD Recording | Yes | Yes | Yes |
| Facecam | Yes | Yes | Yes |
| Drawing Tools | Yes | Yes | Yes |
| Video Editing | Yes | Yes | No |
| Root Required | No | No | No |
| Free Version | Yes (with ads) | Yes (with ads) | Yes (with ads) |
Considerations When Choosing an App
When choosing a third-party screen recording app, there are a few things to keep in mind: Features: Think about what featuresyouneed. Doyouneed facecam support? Doyouwant advanced editing tools? Price: Some apps are free with ads, while others require a paid subscription or a one-time purchase to unlock all features. User Reviews: Read reviews from other users to get an idea of the app's reliability and performance. Permissions: Pay attention to the permissions the app requests. Make sureyou'recomfortable with the access it's asking for.
Mastering Audio and Video Settings in Android Screen Recording: How to Record Your Screen
Recording the screen is only half the battle. Getting the audio and video settings right isessentialfor creating professional-looking screen recordings.Let'sdive into the details.
Optimizing Video Quality
Video quality is measured in resolution (e.g., 720p, 1080p, 4K) and frame rate (frames per second, or FPS). Higher resolutions and frame rates generally result in better-looking videos, but they also require more storage space and processing power. For most screen recording purposes, 1080p and 30 FPS should bemorethan adequate. Ifyou'rerecording fast-paced games,youmight want to bump the frame rate up to 60 FPS for smoother motion.
Resolution: 1080p is a good balance between quality and file size. Frame Rate: 30 FPS is fine for most purposes; 60 FPS is better for gaming.
Managing Audio Options
Aswementioned earlier, audio iscrucialfor many screen recordings.You'llusually have the option to record audio from your microphone, system audio, or both. Ifyou'renarrating, microphone audio isessential. Ifyou'rerecording a game and want to capture the game's sound effects and music, system audio is the way to go.Youcan also choose to record both ifyouwant to capture both your voice and the app's sounds.
Microphone: Use for narration and commentary. System Audio: Use for capturing game sounds and app music. Both:Use for capturing both your voice and the app's sounds.
Advanced Audio Tips
For thebestaudio quality, consider using an external microphone. The built-in microphone on your phone is usually decent, but an external microphone can significantly improve the clarity and reduce background noise.Youcan also use a pop filter to reduce plosives (those harsh "p" and "b" sounds that can ruin your audio). And remember to record in a quiet environment to minimize background noise.
Editing and Sharing Your Android Screen Recordings: How to Record Your Screen
Onceyou'vecaptured your screen recording,you'renot quite done yet! Editing your video can make it more polished and professional, and of course,you'llwant to share your masterpiece with the world (or at least with your friends and colleagues).
Basic Editing Techniques
Most screen recording apps come with some basic editing tools.Youcan usually trim the beginning and end of your video to remove any unnecessary footage.Youmight also be able to cut out sections in the middle of your video. Some apps also letyouadd text overlays, annotations, and even music.
Trimming: Remove unnecessary footage at the beginning and end. Cutting: Remove sections in the middle of the video. Text Overlays: Add text to explain or highlight certain points. Annotations: Draw on the screen to emphasize important details.
Advanced Editing Options
Ifyouneed more advanced editing features,youcan use a dedicated video editing app. Some popular options include: Kinemaster: Apowerfulmobile video editor with a wide range of features, including multi-layer editing, chroma keying (green screen), and audio mixing. Power Director: Anotherexcellentmobile video editor with a user-friendly interface and a robust set of features. Filmora Go:Asimplervideo editor that's great for beginners. It offers a good balance of features and ease of use.
Sharing Your Creations
Onceyou'rehappy with your edited screen recording, it's time to share it! Most screen recording apps make it easy to share your videos directly to You Tube, Facebook, and other social media platforms.Youcan also save your video to your device's storage and share it via email, messaging apps, or cloud storage services like Google Drive or Dropbox.
Troubleshooting Common Issues in Android Screen Recording: How to Record Your Screen
Even with thebesttools and techniques,youmight run into some problems when screen recording on Android.Let'stroubleshoot some common issues.
Fixing Audio Problems
No Audio: Make sureyou'veselected the correct audio source (microphone, system audio, or both) in your screen recording app's settings. Also, check that your microphone is not muted and that your device's volume is turned up. Low Audio: Try moving closer to your microphone or using an external microphone for better audio quality. Distorted Audio:Check that your microphone is not too close to your mouth and that your device's audio input level is not set too high.
Addressing Video Issues
Low Video Quality: Increase the resolution and frame rate in your screen recording app's settings. Laggy Video: Close any unnecessary apps running in the background to free up processing power.Youmight also want to try lowering the resolution and frame rate. Screen Recorder Not Working:Restart your device and try again. If that doesn't work, try clearing the app's cache and data or reinstalling the app.
Security and Privacy Considerations
Before recording your screen, it'simportantto consider security and privacy. Avoid recording sensitive information like passwords, bank details, or personal messages. Also, be mindful of copyright laws and avoid recording copyrighted content without permission.
Wrapping Up: Your Journey into Android Screen Recording: How to Record Your Screen
Congratulations,friends!You'vereached the end of thiscomprehensiveguide to Android screen recording!Younow have the knowledge and tools to captureeverythinghappening on your screen, whether it's creating tutorials, documenting bugs, or sharing yourepicgaming moments.
We'vecovered the basics of screen recording, explored built-in screen recorders and third-party apps, delved into audio and video settings, discussed editing and sharing techniques, and even tackled some common troubleshooting issues.
The next step is to put your newfound knowledge into practice. Grab your Android device, choose your preferred screen recording method, and start capturing your screen!Whether you choose the built-in option or a third-party app, now you have the resources to start.
So what willyoucreate? A helpful tutorial? A hilarious gaming montage? The possibilities are endless. Don't be afraid to experiment, have fun, and share your creations with the world!Now that you are equipped with the information necessary to do so, it's time to record that screen!
With screen recording as a tool,youare able to communicate information, document issues, and share experiences more effectively. Embrace this technology, leverage your new found skills, and always keep pushing your creative boundaries.
The power to captureanythingon your screen is now in your hands.Go create something amazing!
Post a Comment for "Android Screen Recording: How to Record Your Screen"
Post a Comment