Windows 11: Using the Snipping Tool Effectively
Windows 11 Snipping Tool: Your Ultimate Guide to Effortless Screenshots
Windows 11 Snipping Tool: Your Ultimate Guide to Effortless Screenshots
Hey there, screenshot aficionados! Tired of clunky, complicated screenshot methods? Ever wished capturing that perfect meme or essential work document could be as easy asblink? Then buckle up, because we're diving deep into the wonderful world of the Windows 11 Snipping Tool! This isn't your grandpa's Print Screen button (though we'll touch on that too, for old time's sake). We're talking about a powerhouse of screen-grabbing goodness, packed with features you probably didn't even know existed.
The thing is, taking screenshots is a daily ritual for many of us. Whether you're sharing a hilarious text exchange with your bestie, documenting a bug for your IT department, or saving a recipe you found online, screenshots areessential. But let's be honest, the default Windows screenshot process can feel…clunky. Remembering keyboard shortcuts, pasting into Paint, cropping, saving…it's a wholething. And that's where the Snipping Tool swoops in to save the day!
Imagine this:you're on a conference call and someone shares a crucial piece of information. Instead of scrambling for a pen and paper, you can instantly capture the relevant section of the screen with a simple drag and click. Or maybe you're building a presentation and need to quickly grab images from different websites. No more downloading, cropping, and resizing – the Snipping Tool does it all for you. It's a productivitysuperhero, disguised as a simple utility.
But here's the kicker: many people only scratch the surface of what the Snipping Tool can actually do. They use it for basic rectangular snips and call it a day. Little do they know, there's a whole universe of features waiting to be explored! We're talking free-form snips, window snips, full-screen snips, annotation tools, and even delayed snips for capturing those fleeting moments.
And guess what? Windows 11 has given the Snipping Tool a serious glow-up. It's now even more intuitive, powerful, and dare we say,funto use. But with all these new features comes a slight learning curve. That's where this guide comes in. We're going to break down everything you need to know about the Windows 11 Snipping Tool, from the basics to the advanced techniques, so you can become a screenshotmaster.
We'll cover:
Launching the Snipping Tool like a pro
Mastering the different snip modes
Annotating and editing your screenshots
Utilizing keyboard shortcuts for maximum efficiency
Troubleshooting common issues
And much, much more!
So, are you ready to unlock the full potential of the Windows 11 Snipping Tool and say goodbye to screenshot frustration forever? Keep reading, friends, because the adventure is just beginning! Prepare to become the envy of your colleagues, the screenshot savant of your friend group, and the ultimate productivity ninja. Are you ready to snip your way to success? Let's dive in!
Launching the Snipping Tool: Multiple Ways to Snip
Okay, so you're pumped to start snipping, but how do you actuallylaunchthe darn thing? Fear not! Windows 11 offers a multitude of ways to access the Snipping Tool, catering to your preferred style and workflow. Let's explore the most common methods:
The Search Bar Method: Quick and Easy
This is perhaps the most straightforward approach. Simply click on the search bar in your taskbar (or press the Windows key and start typing) and type "Snipping Tool." The app should pop up at the top of the search results. Click on it, andvoilà, the Snipping Tool is ready to go! This method is perfect for those who prefer a visual approach or don't remember the keyboard shortcut. It's reliable and always accessible. Imagine you're in a hurry to grab a quick snip of something – this method is your best friend. It's the digital equivalent of grabbing a pen and paper off your desk.
The Keyboard Shortcut: Snipping Speed Demon
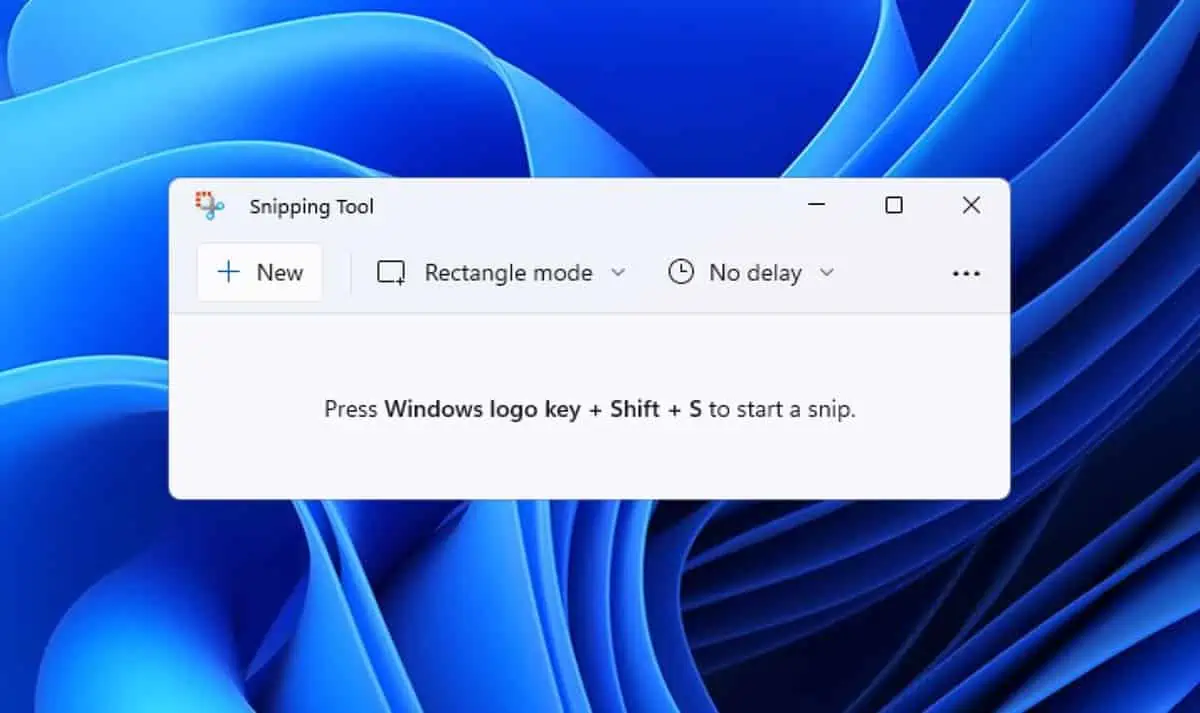
For those who crave speed and efficiency, the keyboard shortcut is your secret weapon. PressWindows Key + Shift + S simultaneously, and the screen will dim, indicating that the Snipping Tool is active. Your cursor will transform into a crosshair, ready to capture the perfect snip. This method is ideal for frequent screenshot takers and those who want to minimize mouse movement. It's like having a screenshot button built directly into your brain. Think of it as your digital reflex – see something, snip it! With practice, you'll be snipping so fast, your friends will think you have superpowers.Just don't tell them our secret.
The Notification Center: Hidden Gem
Did you know that the Snipping Tool can also be accessed through the Notification Center? Click on the notification icon in the bottom right corner of your taskbar (or pressWindows Key + N). If the Snipping Tool isn't readily visible, you might need to expand the "Quick Actions" section. Once you find it, click on it to launch the app. This method is particularly useful if you have other quick actions you frequently use, such as connecting to Wi-Fi or adjusting the volume. It's a one-stop shop for common tasks. It’s like finding a hidden shortcut on your favorite video game – a pleasant surprise that makes your life a little easier.
Through the Start Menu:Classic Approach
For those who prefer the traditional Start Menu approach, simply click on the Start button, navigate to the "All apps" section, and scroll down until you find the Snipping Tool. Click on it to launch the app. This method might be slightly slower than the others, but it's a reliable option for those who prefer to browse through their applications. It's like taking the scenic route – you might not get there as fast, but you get to see everything along the way. Plus, it's a great way to discover other hidden gems in your Windows 11 installation.
Setting Up a Custom Keyboard Shortcut: The Ultimate Hack
For the truly dedicated screenshot artist, you can even set up a custom keyboard shortcut to launch the Snipping Tool. This involves diving into the system settings, but it's well worth the effort if you want to create a truly personalized experience. To do this, search for "Accessibility Keyboard Settings" and scroll to "Print Screen Shortcut." Enable the option to "Use the Prt Scn button to open screen snipping." Now, pressing the Print Screen button will launch the Snipping Tool directly. This is theultimatecustomization option, allowing you to tailor the Snipping Tool to your exact needs. It's like having a secret handshake with your computer – a special signal that only you know.
No matter which method you choose, launching the Snipping Tool is quick and easy. So go ahead, experiment with different approaches and find the one that works best for you. Once you've mastered the art of launching, you're ready to explore the exciting world of snip modes!
Mastering Snip Modes: Choosing the Right Tool for the Job
Now that you know how to launch the Snipping Tool, it's time to explore its various snip modes. Each mode allows you to capture different types of screenshots, catering to specific needs and situations. Understanding these modes is crucial for maximizing the Snipping Tool's potential and creating the perfect screenshot every time.
Rectangular Mode: The Classic Choice
This is the default mode and the one most people are familiar with. It allows you to capture a rectangular area of the screen by dragging a crosshair cursor around the desired region. Simply click and drag to define the rectangle, and release the mouse button to capture the snip. This mode is perfect for capturing specific sections of a window, portions of a website, or any other rectangular area on your screen. It's the workhorse of the Snipping Tool, reliable and versatile. Imagine you need to capture a specific paragraph from an online article – rectangular mode is your go-to tool. It's the digital equivalent of highlighting a section of text with a marker.
Window Mode: Capture a Single Window with Ease
This mode allows you to capture an entire window with a single click. When you select Window Mode, the Snipping Tool will highlight all the open windows on your screen. Simply click on the window you want to capture, and the Snipping Tool will automatically grab the entire window, including the title bar and borders. This mode is ideal for capturing application windows, dialog boxes, or any other standalone window. It's a huge time-saver compared to manually dragging a rectangle around the window. Think of it as a magic wand that automatically captures the entire window with a simple tap. It’s particularly useful when you need to capture a specific error message or application interface.
Full-Screen Mode: Capture Everything
As the name suggests, this mode captures the entire screen, including the taskbar, system tray, and all open windows. It's the simplest and fastest way to capture everything that's currently displayed on your monitor. This mode is useful for capturing general overviews of your desktop, documenting system errors, or creating tutorials. It's the "big picture" mode, capturing everything in one fell swoop. Imagine you need to document a bug in an application – full-screen mode allows you to capture the entire screen, providing valuable context to the developers. It's the digital equivalent of taking a snapshot of your entire workspace.
Freeform Mode: Unleash Your Creativity
This mode allows you to capture a freeform shape by drawing around the desired area with your mouse. Simply click and drag to create a custom shape, and the Snipping Tool will capture everything within that shape. This mode is perfect for capturing irregularly shaped objects, highlighting specific areas on an image, or adding a touch of creativity to your screenshots. It's the artistic mode, allowing you to express your inner screenshot Picasso. Imagine you need to capture a specific object from a photo – freeform mode allows you to trace around it and isolate it from the background. It's the digital equivalent of cutting out a shape with scissors.
Using the Snipping Tool Delay Function: Capture Fleeting Moments
Sometimes, you need to capture something that appears only momentarily, like a dropdown menu or a disappearing notification. That's where the Snipping Tool's delay function comes in handy. Before you select your snip mode, click on the "Delay" dropdown menu. You can choose a delay of 3, 5, or 10 seconds. This gives you time to set up the screen exactly as you want it before the Snipping Tool activates. It's perfect for capturing those fleeting moments that would otherwise be impossible to capture. Think of it as a screenshot time machine – allowing you to capture events that happen in the future (relative to your current click). It's especially useful for capturing tooltips or animations.
Each snip mode offers a unique way to capture screenshots. Experiment with different modes and find the ones that best suit your needs. Mastering these modes will significantly improve your screenshot game and make you a true Snipping Tool pro.
Annotating and Editing Screenshots: Adding Your Personal Touch
Once you've captured your screenshot, the Snipping Tool opens the captured image in its editor, where you can add annotations, highlights, and other edits to enhance your image. These tools are essential for adding context, emphasizing important information, and generally making your screenshots more useful and visually appealing.
The Pen Tool: Freehand Drawing and Writing
The Pen tool allows you to draw freehand lines and shapes on your screenshot. You can choose from a variety of colors and pen thicknesses to create different effects. This tool is perfect for underlining text, circling important elements, or adding handwritten notes to your screenshots. It's the digital equivalent of grabbing a pen and doodling on a piece of paper. Imagine you need to highlight a specific area on a map – the Pen tool allows you to draw a circle around it and add a custom label. It's a versatile tool for adding personal touches to your screenshots.Just try not to draw mustaches on everyone.
The Highlighter Tool: Emphasize Key Information
The Highlighter tool allows you to emphasize specific sections of your screenshot by adding a translucent highlight. You can adjust the color and thickness of the highlight to create different effects. This tool is ideal for highlighting important text passages, drawing attention to key elements, or adding a subtle emphasis to your screenshots. It's the digital equivalent of using a highlighter marker to emphasize important information in a book. Imagine you need to draw attention to a specific line of code in a screenshot – the Highlighter tool allows you to easily highlight it and make it stand out.
The Eraser Tool: Correcting Mistakes with Ease
The Eraser tool allows you to erase any annotations or highlights that you've added to your screenshot. Simply click and drag over the areas you want to erase. This tool is essential for correcting mistakes, cleaning up your annotations, and ensuring that your screenshots are polished and professional. It's the digital equivalent of using an eraser to remove pencil marks from a piece of paper. Imagine you accidentally drew a line in the wrong place – the Eraser tool allows you to quickly remove it and start over. It's a lifesaver for perfectionists.
The Crop Tool: Fine-Tuning Your Composition
The Crop tool allows you to crop your screenshot to focus on specific areas of interest. Simply drag the handles on the edges of the screenshot to define the cropping area, and then click the "Apply" button to crop the image. This tool is useful for removing unnecessary elements, improving the composition of your screenshot, and highlighting the most important information. It's the digital equivalent of cropping a photo to remove distracting elements and focus on the subject. Imagine you captured a full-screen screenshot but only need a small portion of it – the Crop tool allows you to easily extract the relevant area and discard the rest.
Saving and Sharing Your Masterpiece
Once you've finished annotating and editing your screenshot, you can save it to your computer or share it with others. The Snipping Tool supports a variety of file formats, including PNG, JPEG, and GIF. You can also copy the screenshot to your clipboard and paste it into another application, such as an email or a document. Sharing your screenshots is a breeze. Whether you need to send a quick screenshot to a colleague or publish a detailed tutorial online, the Snipping Tool makes it easy to share your creations with the world.
By mastering the annotation and editing tools, you can transform your screenshots from simple images into powerful communication tools. Add your personal touch, emphasize important information, and create visually appealing screenshots that effectively convey your message.
Keyboard Shortcuts for Maximum Efficiency: The Power User's Secret
As with most Windows applications, the Snipping Tool offers a range of keyboard shortcuts that can significantly speed up your workflow. Mastering these shortcuts will allow you to capture, annotate, and edit screenshots with lightning speed, making you a true Snipping Tool power user.
Launching the Snipping Tool: The Essential Shortcut
As we mentioned earlier, the most important keyboard shortcut isWindows Key + Shift + S, which instantly launches the Snipping Tool and activates the screen capture mode. This shortcut is essential for anyone who frequently takes screenshots. Memorize it, embrace it, and let it become an extension of your reflexes. It's the foundation upon which your Snipping Tool mastery will be built.
Taking a New Snip:Quick Reset
Once the Snipping Tool is open, you can pressCtrl + N to start a new snip. This is useful if you want to quickly capture multiple screenshots in a row. It saves you from having to close and reopen the Snipping Tool each time.
Saving Your Snip: Protecting Your Creation
To save your current snip, pressCtrl + S. This will open the "Save As" dialog box, allowing you to choose a file name, location, and format for your screenshot. It's crucial to save your screenshots regularly to avoid losing your work.
Copying to Clipboard:Instant Sharing
To copy your current snip to the clipboard, pressCtrl + C. This allows you to quickly paste the screenshot into another application, such as an email, document, or image editor. It's a fast and convenient way to share your screenshots without saving them to a file first.
Opening an Existing Image:Editing Existing Screenshots
To open an existing image in the Snipping Tool for editing, pressCtrl + O. This will open the "Open" dialog box, allowing you to browse your computer for an image file. This is useful if you want to annotate or edit a screenshot that you took previously.
Printing Your Snip:Hard Copy Time
To print your current snip, pressCtrl + P. This will open the print dialog box, allowing you to select your printer and adjust the print settings. This is useful if you need a physical copy of your screenshot.
Using the Pen Tool:Drawing on the Fly
While there isn't a specific keyboard shortcut to directly select the Pen tool, you can quickly access it by using the Alt key in combination with the underlined letter in the menu. For example, if the "Pen" option in the menu has an underlined "P," you can pressAlt + P to activate the Pen tool. This applies to other tools in the menu as well.
Using the Highlighter Tool: Emphasizing with Speed
Similar to the Pen tool, you can quickly access the Highlighter tool by using the Alt key in combination with the underlined letter in the menu.
By incorporating these keyboard shortcuts into your workflow, you can significantly improve your Snipping Tool efficiency. Practice these shortcuts regularly, and they will become second nature, allowing you to capture, annotate, and edit screenshots like a seasoned pro.
Troubleshooting Common Issues: Overcoming Snipping Hurdles
Even with its user-friendly interface, the Snipping Tool can sometimes encounter issues. Here's a rundown of some common problems and how to fix them:
Snipping Tool Not Opening: Restart and Check Services
If the Snipping Tool refuses to launch, the first thing to try is restarting your computer. This often resolves temporary glitches and clears up any conflicting processes. If that doesn't work, check if the "Touch Keyboard and Handwriting Panel Service" is running. This service is sometimes required for the Snipping Tool to function properly. To check, pressWindows Key + R, type "services.msc", and press Enter. Locate the service, right-click on it, and select Restart.### Screenshot Turns Black:Disable Hardware Acceleration
Sometimes, when taking screenshots, the resulting image might appear completely black. This is often caused by hardware acceleration issues. To disable hardware acceleration, search for "Graphics Settings" in the Start Menu, click "Change default graphics settings," and toggle "Hardware-accelerated GPU scheduling" to Off.Restart your computer for the changes to take effect.
Snipping Tool Freezes: Update or Reinstall
If the Snipping Tool frequently freezes or becomes unresponsive, try updating your Windows installation. Microsoft often releases updates that address bugs and improve performance. If updating doesn't help, you can try reinstalling the Snipping Tool. To do this, go to "Settings" -> "Apps" -> "Apps & features," find the Snipping Tool, and click Uninstall.Then, restart your computer and reinstall the Snipping Tool from the Microsoft Store.
The Print Screen Button Doesn't Work: Check Settings and Drivers
If pressing the Print Screen button doesn't launch the Snipping Tool (or doesn't work at all), check your keyboard settings. Ensure that the Print Screen key is properly mapped and that there are no conflicting keyboard shortcuts. Also, make sure your keyboard drivers are up to date. Outdated or corrupted drivers can sometimes cause keyboard malfunctions.
Annotations Disappear: Save Frequently
A frustrating issue can be that your annotations are not there after you open the snipped image. Always remember to save your annotations before closing the Snipping Tool. If the application closes unexpectedly, all unsaved changes will be lost. Make it a habit to save your work frequently to avoid losing your annotations.
Permissions Error: Run as Administrator
In some cases, you might encounter a permissions error when trying to save your screenshots. This can happen if the Snipping Tool doesn't have the necessary permissions to access the specified save location. To resolve this, try running the Snipping Tool as an administrator. Right-click on the Snipping Tool icon and select "Run as administrator."
By following these troubleshooting tips, you can overcome common Snipping Tool issues and ensure a smooth and productive screenshot experience. Don't let technical glitches get in the way of your snipping adventures!
The Windows 11 Snipping Tool is more than just a simple screenshot utility. It's a powerful tool that can significantly improve your productivity, communication, and creativity. By mastering its features, keyboard shortcuts, and troubleshooting techniques, you can unlock its full potential and become a screenshot savant. Go forth and snip with confidence!
Windows 11 Snipping Tool: Unleash Your Inner Screenshot Artist
We've reached the end of our journey through the wonderful world of the Windows 11 Snipping Tool! Hopefully, you now feel empowered to capture, annotate, and share screenshots like a truepro. Remember, the Snipping Tool is your secret weapon for everything from documenting bugs to sharing funny memes. It's a versatile tool that can make your digital life a whole lot easier.
Throughout this guide, we've covered everything from launching the Snipping Tool to mastering snip modes, annotating screenshots, utilizing keyboard shortcuts, and troubleshooting common issues. We've explored the power of rectangular snips, window snips, full-screen snips, and freeform snips. We've learned how to add annotations, highlights, and erasures to our screenshots. And we've discovered the magic of keyboard shortcuts for maximum efficiency.
The Windows 11 Snipping Tool provides efficiency and versatility. You can capture anything from a specific window to the whole screen with a single click or use advanced tools like freeform snips for complex areas. Mastering the annotation and editing features also allows for adding highlights and notes, and with keyboard shortcuts, a quick snip is ready in seconds.
But knowledge is only half the battle. The real key to mastering the Snipping Tool ispractice. Don't be afraid to experiment with different features, try out different keyboard shortcuts, and explore the various settings. The more you use the Snipping Tool, the more comfortable and confident you'll become.
So, what's next? It's time to put your newfound knowledge into action! Start using the Snipping Tool in your daily workflow. Capture screenshots of everything and anything. Share your creations with your friends, family, and colleagues. And most importantly, have fun!
Here's your call to action: Go forth and capture at least five screenshots today using different snip modes and annotation tools. Share one of your creations on social media with the hashtag #Windows11Snipping Tool. Let's spread the word about this amazing tool and help others unlock its potential!
Remember, the Windows 11 Snipping Tool is a powerful tool that can help you communicate more effectively, collaborate more efficiently, and express your creativity in new and exciting ways. Embrace it, master it, and let it become an indispensable part of your digital toolkit. Now go forth and snip your way to success!
Feeling like a screenshot superhero yet? Now that you're armed with the knowledge and skills to conquer any screenshot challenge, go out there and unleash your inner screenshot artist! And remember, the best way to learn is by doing. So don't be afraid to experiment, explore, and have fun with the Windows 11 Snipping Tool. What will you snip next?
Post a Comment for "Windows 11: Using the Snipping Tool Effectively"
Post a Comment