Windows 11: How to Customize the Start Menu
Windows 11: Tame Your Start Menu Like a Pro!
Navigating Windows 11 just got a whole lot easier (and dare we say,more fun)! This guide unlocks the secrets to customizing your Start Menu, making it a reflection ofyourneeds and style.
Let's Face It:The Default Start Menu Can Be...Underwhelming
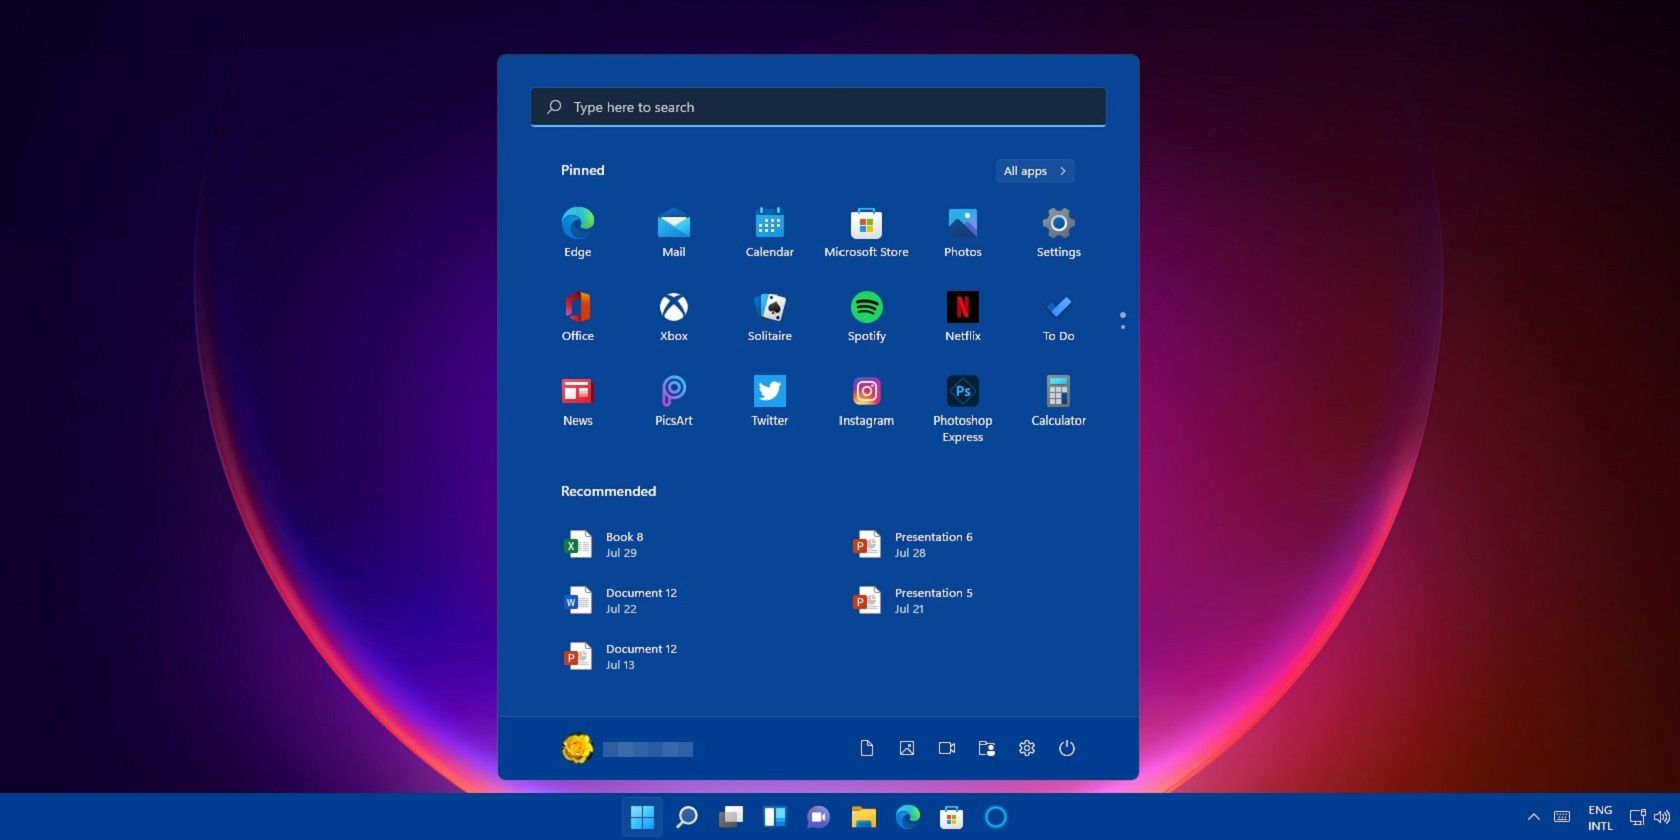
Let's be honest, friends. The default Windows 11 Start Menu, while a step up from some previous iterations, can feel a bit… generic. It's like showing up to a party in the same outfit as ten other people – functional, sure, but lacking thatpersonal touch. You've got recommended apps you might never use, pinned apps that gather digital dust, and a general sense of meh.We’ve all been there, staring blankly at that screen, wondering why we can't just make itours. You’re clicking through a sea of icons, desperately searching for thatoneapp you needright now. The clock is ticking, your patience is wearing thin, and your desire to throw your computer out the window is steadily increasing. Sound familiar?
The pre-configured arrangement, with its blend of pinned and suggested apps, often misses the mark. It’s like someone else organized your desk drawer –theymight think it's efficient, butyouknow where everythingshouldbe. This inefficiency leads to wasted time, increased frustration, and a feeling that your computer is working against you, rather than for you. Imagine needing to quickly access your email client, but instead, you're forced to sift through a list of pre-installed games and promotional offers. Not exactly ideal, is it?
Think of it like this: you wouldn't let someone else decorate your house without having a say, right? Why should your computer be any different? Customizing your Start Menu allows you to create a digital space that's both functional and aesthetically pleasing, reflecting your unique workflow and preferences. It's about taking control and making your computertruly yours.
The good news is that Windows 11 offers a surprising amount of flexibility when it comes to Start Menu customization. It’s not about forcing you into a pre-defined box; it’s about providing the tools you need to create a Start Menu that worksfor you. We’re talking about pinning your favorite apps, organizing them into logical groups, decluttering the space, and even changing the overall layout.
But where do you even begin? Fear not! This guide is your friendly companion on the journey to Start Menu mastery. We'll break down the process into simple, easy-to-follow steps, transforming your Start Menu from a source of frustration into a hub of productivity andjoy. We’ll cover everything from the basics of pinning and unpinning apps to more advanced techniques like creating custom folders and tweaking the settings to your exact liking.
Ready to ditch the generic and embrace the personalized? Get ready to transform your Windows 11 Start Menu from a cluttered mess into a streamlined, efficient, and utterlyyouexperience. Stick with us, and you'll be amazed at the difference a little customization can make!
Mastering Windows 11: How to Customize the Start Menu Layout
The foundation of a good Start Menu experience lies in its layout. Let's explore how to rearrange things to your liking.
Pinning and Unpinning Apps: This is the bread and butter of Start Menu customization. Want quick access to your most used apps? Simply right-click on any app icon – whether it's in the "All apps" list or already pinned – and select "Pin to Start." Conversely, if an app is taking up valuable real estate without earning its keep, right-click and choose "Unpin from Start." This allows for easy removal of things like suggested apps from Microsoft that are never touched. This can immediately make a huge difference to reduce clutter.
It's like decluttering your physical workspace. Think of those random sticky notes and paperclips that accumulate on your desk. Pinning and unpinning apps is the digital equivalent – keeping only the essentials within easy reach. You can pin applications, settings, folders, and even websites for quick access. Don't be afraid to experiment and see what works best for you. Remember, it's all about creating a personalized experience that reflects your unique workflow.
For instance, if you're a student, you might pin your word processor, presentation software, and research tools to the Start Menu. If you're a gamer, you might pin your favorite games, streaming software, and communication apps. And if you're a creative professional, you might pin your design tools, video editing software, and project management applications. The possibilities are endless!
Rearranging Icons: Once you've pinned your essential apps, it's time to organize them. Click and drag icons to move them around the pinned section of the Start Menu. This simple action allows you to create logical groupings, placing frequently used apps together for easy access. Creating a workflow specific environment.
Think of this like organizing your kitchen cabinets. You wouldn't put your pots and pans next to your spices, would you? Instead, you'd group similar items together for easy access. The same principle applies to your Start Menu. Group your productivity apps together, your entertainment apps together, and your social media apps together. This will make it much easier to find what you're looking for when you need it.
For example, consider placing your email client, calendar, and to-do list app next to each other for quick access to your schedule and tasks. Or, if you frequently use a specific suite of applications, like the Adobe Creative Suite, you might group them together for easy access to all of your design tools. Experiment with different arrangements until you find one that feels intuitive and efficient.
Creating Folders: Windows 11 allows you to create folders within the pinned section of the Start Menu. This is a game-changer for managing a large number of pinned apps. Simply drag one icon on top of another, and a folder will automatically be created. You can then give the folder a descriptive name.
Imagine having a folder for "Work," "Games," "Creative," and Utilities.This instantly declutters the Start Menu and makes it much easier to find specific apps. It's like having different drawers in your desk, each containing specific categories of items. This adds another layer of organization to the pinned applications.
For example, in your "Work" folder, you might include your email client, spreadsheet software, and presentation program. In your "Games" folder, you might include your favorite video games, game launchers, and streaming software. And in your "Creative" folder, you might include your design tools, video editing software, and audio editing software. This streamlined organization will make navigating the Start Menu quicker and easier.
Deep Dive into Windows 11: Customizing Start Menu Settings
Beyond layout, Windows 11 offers a range of settings to further tailor your Start Menu experience.
Choosing What Folders Appear: Navigate to Settings > Personalization > Start. Here, you'll find a list of folders you can add to the bottom of the Start Menu, next to the power button. Options include File Explorer, Settings, Documents, Downloads, Music, Pictures, Videos, Network, and Personal Folder.
This provides one-click access to these essential locations. If you frequently access your Downloads folder, for instance, enabling it here saves you the hassle of navigating through File Explorer. This allows for important access points.
Think about what folders you access most frequently. Are you constantly downloading files? Enable the Downloads folder. Do you need quick access to your documents? Enable the Documents folder. Do you frequently change your system settings? Enable the Settings folder. By customizing these settings, you can tailor the Start Menu to your specific needs.
Controlling "Recommended" Items: In the same Settings > Personalization > Start section, you can control whether the Start Menu displays "Recently added apps" and "Most used apps." You can also clear the history of recently opened items.
While these features can be helpful, they can also clutter the Start Menu with items you don't need. Disabling them gives you more control over what appears in this section. Clearing the history keeps your activities private and tidies up the Start Menu.
If you prefer a minimalist Start Menu, disabling these features is a great way to declutter the space. If you find the recommendations helpful, you can leave them enabled. However, be sure to clear the history periodically to keep things tidy and private. This setting helps to reduce unnecessary clutter.
"Show recently opened items in Start, Jump Lists, and File Explorer": This allows for quick access to documents.
This feature can be incredibly convenient for resuming work on recent projects. With one click, the user will be able to open what was last being worked on, improving workflow and saving time.
For instance, if you are working on a document and close it, Windows will save it, allowing the document to be quickly and easily reopened without having to search for it within the file explorer. This reduces time spent searching for documents and allows more time to be spent working.
Advanced Windows 11 Start Menu Customization: Unleash Your Inner Power User
Ready to take your Start Menu customization to the next level? Let's explore some advanced techniques.
Using Third-Party Customization Tools: While Windows 11 offers decent built-in customization options, third-party tools can unlock even more possibilities. Apps like Start11 (paid) and Open-Shell (free) allow you to completely overhaul the Start Menu's look and feel, bringing back classic Start Menu styles or adding advanced features.
These tools often provide granular control over aspects like icon sizes, transparency, and menu animations. They can also allow you to customize the Start Menu's behavior in ways that aren't possible with the default settings. It will make the start menu more unique.
For example, Start11 allows you to create custom Start Menu layouts, change the icon styles, and even add custom animations. Open-Shell brings back the classic Windows 7-style Start Menu, which many users prefer. Experiment with different tools to find one that suits your needs and preferences.
Editing the Registry (Use with Caution!): For the truly adventurous, it's possible to customize the Start Menu by directly editing the Windows Registry. However, this is an advanced technique that should only be attempted by experienced users, as incorrect modifications can cause system instability.Always back up your registry before making any changes.
Registry edits can allow you to tweak hidden settings and unlock features that aren't exposed in the standard Settings app. This is where expert users can have more control of the menu.
For example, you can use registry edits to disable certain features, customize the appearance of the Start Menu, or even add custom commands. However, be extremely cautious when editing the registry, and always double-check your changes before applying them. It's also a good idea to research any changes you're planning to make before you start.
Creating Custom Shortcuts: You are not limited to just applications. You can also create shortcuts to files, folders, websites, and even custom commands and pin them to the Start Menu.
This allows for quick access to frequently used resources. Just imagine, a single click to your most used webpages. It's all about efficiency.
To create a shortcut, right-click on the desktop, select "New," and then choose Shortcut.Enter the path to the file, folder, website, or command you want to create a shortcut for, and then give the shortcut a descriptive name. Once the shortcut is created, you can pin it to the Start Menu by right-clicking on it and selecting "Pin to Start."
Windows 11: Optimizing the Start Menu for Productivity
Ultimately, a well-customized Start Menu is about boosting your productivity. Here's how to optimize it for efficiency.
Prioritize Frequently Used Apps: The apps you use most often should be front and center in your Start Menu. Pin them to the top of the list and arrange them in a logical order.
This minimizes the time it takes to launch your essential apps. It's all about reducing friction and making it easier to get things done.
Think about your daily workflow. What apps do you use every day? What apps do you use several times a week? These are the apps that should be prioritized in your Start Menu. By placing them within easy reach, you can save valuable time and effort.
Remove Unnecessary Clutter: Get rid of any pinned apps or folders that you don't use regularly. A cluttered Start Menu is a slow Start Menu. Keeping the menu clean is important for workflow.
This helps to reduce visual noise and makes it easier to find the apps you need. It's like cleaning out your closet – getting rid of the clothes you don't wear anymore makes it easier to find the ones you do.
Be honest with yourself. Are you really going to use that pre-installed game that came with Windows 11? If not, unpin it. Are you still using that application you installed six months ago and haven't touched since? If not, unpin it. By decluttering your Start Menu, you can create a more efficient and productive workspace.
Use Descriptive Folder Names: When creating folders in the Start Menu, use clear and descriptive names. This makes it easier to quickly identify the contents of each folder.
Avoid vague names like "Stuff" or Misc.Instead, use specific names like "Work," "Games," or Creative.Names of folders make it easier to identify contents.
When you're creating folders, take the time to think about what you're going to put in them and what name will best describe their contents. The more descriptive your folder names are, the easier it will be to find what you're looking for.
Troubleshooting Common Windows 11 Start Menu Issues
Sometimes, things don't go quite as planned. Here's how to troubleshoot common Start Menu issues.
Start Menu Not Opening: If the Start Menu refuses to open, try restarting your computer. This often resolves temporary glitches. If that doesn't work, try restarting Windows Explorer in Task Manager.
Press Ctrl+Shift+Esc to open Task Manager, find "Windows Explorer" in the list of processes, right-click on it, and select Restart.This will relaunch the graphical interface and often fix Start Menu issues.
If the issue persists, there may be a more serious problem. You can try running the System File Checker to repair corrupted system files. To do this, open Command Prompt as administrator, type "sfc /scannow," and press Enter. The System File Checker will scan your system files and replace any that are corrupted.
Missing Apps: If an app is missing from the Start Menu, make sure it's actually installed on your computer. If it is, try searching for it using the Windows search bar. If the app is still not showing up, you may need to reinstall it.
It's also possible that the app is installed but not properly indexed by Windows Search. To rebuild the search index, go to Settings > Privacy & Security > Searching Windows and click on "Indexing Options." Then, click on "Advanced" and click on Rebuild.This will rebuild the search index and may resolve the issue.
Start Menu Resetting to Default: In rare cases, the Start Menu may reset to its default configuration. This can be caused by system errors or corrupted user profiles.
Unfortunately, there's no easy way to prevent this from happening. However, you can back up your Start Menu layout by exporting the relevant registry keys. This will allow you to quickly restore your custom layout if it ever gets reset. Search online for instructions on how to back up and restore your Start Menu layout using the registry.
Conclusion: Your Personalized Windows 11 Start Menu Awaits!
The Start Menu in Windows 11 is more than just a gateway to your apps; it's a reflection ofyourworkflow and preferences. By mastering the techniques outlined in this guide, you've gained the power to transform it from a source of frustration into a hub of productivity andjoy. We started with the basics of pinning and unpinning, moved on to organizing icons and creating folders, and even explored advanced customization options like third-party tools and registry edits. Remember, the key is to experiment and find what works best for you. Don't be afraid to try new things and personalize your Start Menu to your exact liking.
Now that you're armed with this knowledge, it's time to take action! Spend some time today customizing your Windows 11 Start Menu. Pin your favorite apps, organize them into logical groups, declutter the space, and tweak the settings to your liking. The difference it makes is huge!
Go forth and conquer your Start Menu! Are you ready to make your Windows 11 experience trulyyours?
Post a Comment for "Windows 11: How to Customize the Start Menu"
Post a Comment