Setting Up a VPN on Linux: Secure Your Internet Connection
Setting Up a VPN on Linux: Your Guide to Online Privacy
_Worried about online privacy on your Linux system?_ This article provides a comprehensive guide to setting up a VPN on Linux, ensuring your internet connection is secure and your data stays private.
Setting Up a VPN on Linux: Why Bother?
Alright, friends, let's talk about something weallneed to be thinking about in this digital age: online privacy. I know, I know, it sounds boring, like another one of those lectures your uncle gives at Thanksgiving dinner. But trust me, this is important stuff. We're constantly bombarded with news about data breaches, government surveillance (big brother is watching!), and sneaky corporations tracking our every move online. It's enough to make you want to throw your computer out the window and live off the grid!
Think about it. You’re sitting in your favorite coffee shop, happily sipping your latte and catching up on emails. You're using their free Wi-Fi (because, let's face it, who wants to use up their data?). But did you ever stop to consider who else might be lurking on that same network? Maybe someone's sniffing traffic, trying to steal your passwords or credit card info.Shudders. Or picture this: You're trying to watch thatoneshow that's only available in another country (we'veallbeen there!). Suddenly, a dreaded "This content is not available in your region" message pops up. Frustrating, right?
That's where a VPN, or Virtual Private Network, comes to the rescue. Think of it as your own personal invisibility cloak for the internet. It encrypts your internet traffic, making it unreadable to prying eyes, and masks your IP address, making it look like you're browsing from a different location. It's like a digital bodyguard, protecting your data and giving you more freedom online.
So, why should you specifically care about setting up a VPN on Linux? Well, for starters, you're probably already a bit tech-savvy if you're using Linux. You understand the importance of control and customization. But the truth is, setting up a VPN on Linux can seem a little daunting at first. It's not as simple as downloading an app and clicking a button like it is on Windows or mac OS. You might need to use the command line (gasp!), edit configuration files (double gasp!), and generally get your hands a little dirty.
But fear not, fellow Linux enthusiasts! This guide is here to walk you through the process, step-by-step, in a way that's easy to understand and even (dare I say it?) enjoyable. We'll cover everything from choosing the right VPN provider to configuring your VPN connection using different methods. We'll even throw in some tips and tricks to help you troubleshoot common issues.
By the end of this article, you'll be a VPN master, able to browse the internet with confidence and peace of mind. You'll be able to bypass geo-restrictions, protect your data from hackers, and reclaim your online privacy.
So, are you ready to take control of your internet connection and become a digital ninja? Let's dive in! Are you ready to unlock the secrets to a safer, more private, and unrestricted online experience on your Linux system? Let's begin this exciting journey together!
Choosing the Right VPN for Your Linux System
Alright, before we dive into the nitty-gritty details of setting up a VPN on Linux, let's first talk about choosing the right VPN provider. Not all VPNs are created equal. Some are faster, some are more secure, and some are, well, downright sketchy. It's crucial to pick a VPN that meets your specific needs and priorities.
Here are a few key factors to consider: Security and Privacy:This is the most important aspect,obviously. Look for a VPN provider that has a strict no-logs policy. This means that they don't track or store any of your online activity. Also, check what encryption protocols they use. Open VPN and Wire Guard are generally considered the most secure. Do they have a kill switch? This is a vital feature that automatically disconnects your internet connection if the VPN drops, preventing your data from being exposed.
Speed and Performance: Nobody wants a VPN that slows down their internet connection to a crawl. Look for a VPN provider that has a large network of servers around the world. The closer the server is to your location, the faster your connection will generally be. Some VPNs are just inherently faster than others, depending on their infrastructure and protocols.
Server Locations: If you need to bypass geo-restrictions, you'll want a VPN provider that has servers in the countries you need. For example, if you want to watch BBC i Player in the US, you'll need a VPN with UK servers. A wider server network also means better options for finding a fast and reliable connection.
Linux Compatibility: This might seem obvious, but it's worth mentioning. Make sure the VPN provider offers Linux support. Some VPNs have dedicated Linux apps, while others require manual configuration using Open VPN or Wire Guard. If they have a dedicated app, does it support your specific distribution?
Price: VPN prices can vary widely, from free to quite expensive. Free VPNs often come with limitations, such as data caps, slower speeds, and even potential security risks. It's generally worth paying for a reputable VPN provider to get better security and performance. Consider your budget and what features are most important to you.
Logging Policy:Read the fine print!Many VPNs claim to have a no-logs policy, but some of them still collect some data about your usage. Make sure you understand what data the VPN provider collects and how they use it. A truly no-logs VPN will collect minimal information, such as connection timestamps butnotbrowsing activity.
Reputation: Do a little research and see what other users are saying about the VPN provider. Check reviews on reputable websites and forums. A VPN with a consistently good reputation is more likely to be trustworthy and reliable.
Protocols:Understand the protocols!Open VPN, Wire Guard, IKEv2, and L2TP/IPsec are common VPN protocols. Open VPN and Wire Guard are generally considered the most secure and are often preferred.
Once you've considered these factors, you can start narrowing down your choices. Some popular VPN providers that are known for their Linux support include: Nord VPN: A well-known VPN provider with a dedicated Linux app and a large server network. Express VPN: Another popular VPN provider with good speeds and a user-friendly interface. Surfshark: A budget-friendly option with unlimited simultaneous connections. Proton VPN: A security-focused VPN provider based in Switzerland with a strong emphasis on privacy. Private Internet Access (PIA):A long-standing VPN provider with a large server network and a focus on privacy.
Ultimately, the best VPN for you will depend on your individual needs and preferences. Take some time to research your options and choose a VPN that you trust.
Setting Up Open VPN on Linux: The Command Line Warrior Approach
Alright, let's get our hands dirty! One of the most common and reliable ways to connect to a VPN on Linux is using Open VPN. This involves using the command line, which might seem intimidating at first, but trust me, it's not as scary as it looks. We'll break it down step-by-step.
Here's what you'll need: An Open VPN configuration file (.ovpn file) from your VPN provider. Most VPN providers will provide these files for download. They usually come bundled in a ZIP archive for various servers. Open VPN client installed on your Linux system. Most distributions have this in their repositories.
Here's how to install Open VPN client (examples): Debian/Ubuntu: `sudo apt update && sudo apt install openvpn` Fedora/Cent OS/RHEL: `sudo dnf install openvpn` Arch Linux:`sudo pacman -S openvpn`
Once you have Open VPN installed, you can connect to your VPN using the following steps:
1.Download the Open VPN configuration file from your VPN provider.*This file contains the settings needed to connect to the VPN server.
2.Navigate to the directory where you downloaded the configuration file using the command line.For example, if you downloaded the file to your Downloads folder, you would type `cd Downloads`.
3.Connect to the VPN server using the following command:`sudo openvpn --config your_vpn_config_file.ovpn`
Replace `your_vpn_config_file.ovpn` with the actual name of your Open VPN configuration file.
4.You may be prompted for your VPN username and password.Enter them when prompted.
If everything goes well, you should see a series of messages in the terminal indicating that you've successfully connected to the VPN.
To disconnect from the VPN, simply press `Ctrl+C` in the terminal where you started the Open VPN process.
Important Considerations
Running as Root:The `sudo` command is necessary because connecting to a VPN requires root privileges. Firewall: Ensure your firewall is configured to allow Open VPN traffic. DNS Leaks: You should verify that your DNS requests are being routed through the VPN server to prevent DNS leaks. You can do this by visiting a website like dnsleaktest.com after connecting to the VPN. Automation: For convenience, you can create a script to automatically connect to the VPN when you start your computer.
Troubleshooting
If you encounter errors while connecting, double-check that you've entered your username and password correctly.
Make sure that your Open VPN configuration file is valid and that it hasn't been corrupted.
Check your firewall settings to ensure that Open VPN traffic is allowed.
If you're still having problems, consult your VPN provider's documentation or contact their support team.
While using the command line might seem a bit technical, it gives you more control over your VPN connection. It's also a great way to learn more about how VPNs work under the hood. Don't be afraid to experiment and try different settings. The more you play around with it, the more comfortable you'll become. You'll be a command-line ninja in no time!
Using Network Manager to Configure Your VPN: The GUI Approach
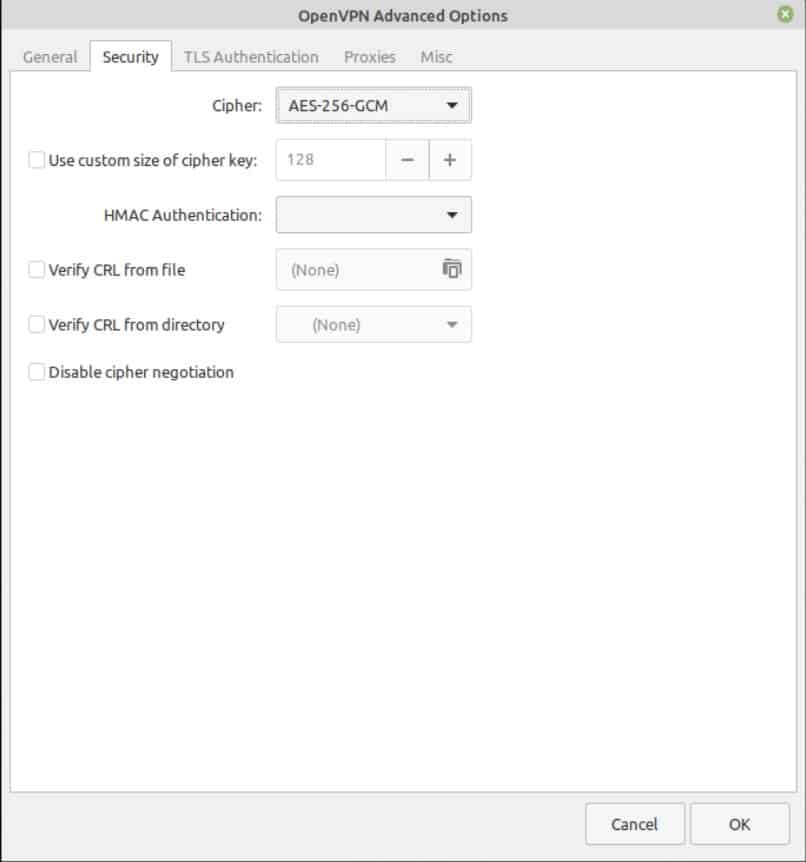
If the command line isn't your cup of tea, don't worry! There's a much easier way to connect to a VPN on Linux: using Network Manager. Network Manager is a network management tool that's included in most Linux distributions. It provides a graphical interface for configuring and managing network connections, including VPNs.
Here's how to configure your VPN using Network Manager:
1.Install the Network Manager Open VPN plugin.This plugin allows Network Manager to connect to Open VPN servers.
Debian/Ubuntu:`sudo apt update && sudo apt install network-manager-openvpn network-manager-openvpn-gnome`
Fedora/Cent OS/RHEL: `sudo dnf install Network Manager-openvpn Network Manager-openvpn-gnome`
Arch Linux: `sudo pacman -S networkmanager-openvpn`
2.Open Network Manager settings.*This can usually be done by clicking on the network icon in your system tray and selecting "Network Settings" or "Edit Connections."
3.Click the "+" button to add a new connection.4.Choose "VPN" as the connection type.5.Choose "Import a saved VPN configuration" if you have an .ovpn file from your provider, or "Open VPN" if you want to configure manually.6.If importing, select your .ovpn file.*Network Manager will automatically import the settings from the file.
7.If configuring manually, enter the VPN settings provided by your VPN provider.This will typically include the server address, connection type, username, and password.
8.Click "Add" or "Save" to save the VPN connection.9.Connect to the VPN by clicking on the network icon in your system tray and selecting the VPN connection you just created.
Network Manager will then connect to the VPN server and establish a secure connection. You can disconnect from the VPN by clicking on the network icon again and selecting Disconnect.
Key Advantages of Using Network Manager
Ease of Use:Network Manager provides a graphical interface that's much easier to use than the command line. Integration: Network Manager is tightly integrated with the Linux desktop environment, making it easy to connect to and disconnect from VPNs. Automatic Reconnection:Network Manager can automatically reconnect to the VPN if the connection drops.
Troubleshooting
If you encounter problems connecting to the VPN, double-check that you've entered the correct settings.
Make sure that the Network Manager Open VPN plugin is installed correctly.
Check your firewall settings to ensure that VPN traffic is allowed.
If you're still having problems, consult your VPN provider's documentation or contact their support team.
Network Manager is a great option for users who prefer a graphical interface and want a seamless VPN experience on Linux. It's easy to set up and use, and it integrates well with the desktop environment.
Wire Guard: The New Kid on the Block for VPN Security
Wire Guard is a relatively new VPN protocol that's gaining popularity due to its speed, security, and ease of use. It's designed to be faster and more efficient than traditional VPN protocols like Open VPN, while still providing strong encryption. If your VPN provider supports Wire Guard, it's definitely worth considering.
Here's how to set up Wire Guard on Linux:
1.Install the Wire Guard tools.
Debian/Ubuntu: `sudo apt update && sudo apt install wireguard`
Fedora/Cent OS/RHEL: `sudo dnf install wireguard-tools`
Arch Linux: `sudo pacman -S wireguard-tools`
2.Obtain the Wire Guard configuration file from your VPN provider.*This file contains the settings needed to connect to the VPN server. Wire Guard configurations are often simpler than Open VPN configs.
3.Create a Wire Guard interface configuration file.*This file will contain the Wire Guard settings for your connection. The configuration file should have a `.conf` extension and be placed in the `/etc/wireguard/` directory. For example, you might create a file named `/etc/wireguard/wg0.conf`.
4.Edit the configuration file with the information from your VPN provider.The configuration file will typically include the following settings:`[Interface]`
`Private Key = your_private_key`
`Address = your_ip_address/subnet_mask`
`DNS = your_dns_server`
`[Peer]`
`Public Key = server_public_key`
`Allowed IPs = 0.0.0.0/0` (this routes all traffic through the VPN)
`Endpoint = server_address:port`
5.Set the correct permissions for the configuration file: `sudo chmod 600 /etc/wireguard/wg0.conf`
6.Bring up the Wire Guard interface: `sudo wg-quick up wg0`
7.To disconnect, bring the interface down: `sudo wg-quick down wg0`
Key Advantages of Using Wire Guard
Speed: Wire Guard is generally faster than Open VPN due to its more efficient design. Security: Wire Guard uses state-of-the-art cryptography to provide strong security. Ease of Use:Wire Guard configurations are relatively simple compared to Open VPN.
Troubleshooting
Double-check that you've entered the correct settings in the configuration file.
Make sure that your firewall is configured to allow Wire Guard traffic (UDP port 51820 by default).
Check your routing table to ensure that traffic is being routed through the Wire Guard interface. You can use the `route -n` command to view your routing table.
If you're still having problems, consult your VPN provider's documentation or contact their support team.
Wire Guard is a promising new VPN protocol that offers a great combination of speed, security, and ease of use. If you're looking for a fast and secure VPN connection on Linux, Wire Guard is definitely worth considering.
Testing Your VPN Connection: Ensuring Everything is Working Correctly
Alright, so you've set up your VPN, either using Open VPN, Network Manager, or Wire Guard. But how do you know if it's actually working correctly? It's crucial to test your VPN connection to make sure that your traffic is being encrypted and your IP address is being masked.
Here are a few ways to test your VPN connection: Check Your IP Address: This is the most basic test. Before connecting to the VPN, visit a website like whatismyip.com. Note your IP address. Then, connect to the VPN and refresh the page. Your IP address should have changed to the IP address of the VPN server. If it hasn't, something is wrong. Check Your Location: Many websites can detect your location based on your IP address. After connecting to the VPN, visit a website like iplocation.net. It should show your location as being in the same country as the VPN server you're connected to. Check for DNS Leaks: DNS leaks occur when your DNS requests are not being routed through the VPN server. This can expose your actual IP address and location. Visit a website like dnsleaktest.com. Run the standard test and the extended test. It should only show the DNS servers of your VPN provider. If it shows your ISP's DNS servers, you have a DNS leak. Test Your Speed: Connect to the VPN and run a speed test using a website like speedtest.net. Compare the results to your speed without the VPN. There will almost always be some speed reduction when using a VPN, but it shouldn't be too significant. If your speed is drastically slower, try connecting to a different VPN server. Check for Web RTC Leaks: Web RTC (Web Real-Time Communication) is a technology that allows browsers to communicate directly with each other without the need for a middleman. This can potentially expose your real IP address, even when using a VPN. You can test for Web RTC leaks by visiting a website like browserleaks.com/webrtc. Use a VPN Leak Test Tool: There are several online tools that can perform a comprehensive VPN leak test, checking for IP leaks, DNS leaks, Web RTC leaks, and other potential issues. These tools can provide a more thorough assessment of your VPN connection.
If you find any leaks, here are a few things you can try
Enable the VPN's Kill Switch: A kill switch will automatically disconnect your internet connection if the VPN drops, preventing your data from being exposed. Disable IPv6: IPv6 can sometimes bypass the VPN and expose your real IP address. You can disable IPv6 in your network settings. Configure Your Firewall: Ensure that your firewall is configured to block all traffic except for traffic that is routed through the VPN. Change Your DNS Settings: Configure your system to use the DNS servers provided by your VPN provider. Use a Different VPN Protocol: Try switching to a different VPN protocol, such as Open VPN or Wire Guard. Contact Your VPN Provider: If you're still having problems, contact your VPN provider's support team.
Testing your VPN connection is a crucial step in ensuring your online privacy and security. Don't skip this step! Make sure that your traffic is being encrypted and your IP address is being masked before you start browsing the internet.
Troubleshooting Common VPN Issues on Linux
Okay, so you've set up your VPN, you've tested it, and… something's not quite right. Don't panic! VPNs can be a little finicky, and it's common to encounter issues. Here are some common VPN problems on Linux and how to fix them: Cannot Connect to VPN Server:
Problem: You try to connect to the VPN, but it just keeps failing.
Solution:
Check your internet connection: Make sure you have a working internet connection.
Verify your VPN credentials: Double-check that you've entered your username and password correctly.
Check your firewall settings: Ensure that your firewall is not blocking VPN traffic.
Try a different VPN server: The server you're trying to connect to might be down.
Check your VPN provider's website: They may be experiencing technical difficulties. Slow Connection Speeds:
Problem: Your internet connection is significantly slower when connected to the VPN.
Solution:
Choose a server closer to your location: The closer the server is to your location, the faster your connection will generally be.
Try a different VPN protocol: Open VPN can be slower than Wire Guard.
Check your VPN provider's server load: Some servers might be overloaded, leading to slower speeds.
Upgrade your VPN subscription: Some VPN providers offer faster speeds on higher-tier plans. DNS Leaks:
Problem: Your DNS requests are not being routed through the VPN server, exposing your real IP address.
Solution:
Enable DNS leak protection in your VPN client: Most VPN clients have a setting to prevent DNS leaks.
Manually configure your DNS settings: Configure your system to use the DNS servers provided by your VPN provider.
Use a different VPN protocol: Some VPN protocols are more prone to DNS leaks than others. Web RTC Leaks:
Problem: Web RTC is exposing your real IP address, even when using a VPN.
Solution:
Disable Web RTC in your browser: Most browsers have extensions or settings that allow you to disable Web RTC.
Use a browser that blocks Web RTC: Some browsers, like Tor Browser, are designed to block Web RTC by default. VPN Disconnecting Frequently:
Problem: Your VPN connection keeps dropping.
Solution:
Check your internet connection: A flaky internet connection can cause VPN disconnections.
Enable the VPN's kill switch: This will prevent your data from being exposed if the VPN disconnects.
Try a different VPN server: The server you're connected to might be unstable.
Adjust your VPN client settings: Some VPN clients have settings that can help prevent disconnections. Firewall Issues:
Problem: Your firewall is blocking VPN traffic.
Solution:
Configure your firewall to allow VPN traffic: You'll need to allow traffic on the port used by the VPN protocol (e.g., UDP port 1194 for Open VPN).
Temporarily disable your firewall: If you're not sure how to configure your firewall, you can temporarily disable it to see if that resolves the issue.Be careful when doing this!
If you've tried all of these solutions and you're still having problems, contact your VPN provider's support team. They may be able to provide more specific troubleshooting advice. Remember, patience is key. Troubleshooting VPN issues can sometimes be a process of trial and error. Don't give up! With a little persistence, you'll be able to get your VPN working correctly.
Securing Your Entire Network with a VPN Router
Want to protectallthe devices on your home network with a VPN? Consider setting up a VPN router. This involves flashing a router with custom firmware like DD-WRT or Open WRT, which allows you to configure a VPN connection at the router level. All devices connected to the router will then automatically be protected by the VPN.
This is a more advanced setup, but it offers several advantages: Protects all devices on your network: You don't have to install VPN software on each individual device. Protects devices that don't support VPNs: This includes devices like smart TVs, game consoles, and Io T devices. Convenience:Once configured, the VPN connection is always active.
Here's a general overview of the steps involved in setting up a VPN router:
1.Choose a compatible router: Not all routers are compatible with DD-WRT or Open WRT. Check the compatibility list on the DD-WRT or Open WRT website.
2.Download the appropriate firmware for your router.3.Flash the router with the custom firmware.*This process varies depending on the router model. Follow the instructions on the DD-WRT or Open WRT website carefully.This can be risky, and you could brick your router if you do it wrong!
4.Configure the VPN connection in the router's settings.*This typically involves entering the VPN server address, username, and password.
5.Connect your devices to the router.Important Considerations:
Router Compatibility: Ensure your router is compatible with DD-WRT or Open WRT and that you download the correct firmware version. Flashing Process: The flashing process can be risky. Follow the instructions carefully to avoid bricking your router. Performance: Running a VPN on a router can impact performance, especially on older routers. Choose a router with sufficient processing power. Technical Knowledge: Setting up a VPN router requires a good understanding of networking concepts.
Setting up a VPN router is a great way to protect your entire home network with a VPN. However, it's important to understand the risks involved and to have the necessary technical knowledge. If you're not comfortable with flashing your router, you may want to consider hiring a professional.
Alternative: Pre-Flashed VPN Routers
If you don't want to go through the hassle of flashing a router yourself, you can buy a pre-flashed VPN router. These routers come with DD-WRT or Open WRT pre-installed and are ready to be configured with your VPN credentials. This is a more expensive option, but it's much easier than flashing a router yourself.
Using a VPN router ensures that everything connected to it, from computers and smartphones to smart TVs and gaming consoles, is protected by the VPN. This is especially useful for devices that do not natively support VPN software.
Conclusion: Taking Control of Your Online Privacy with Linux and VPNs
_Congratulations!_ You've made it to the end of this comprehensive guide on setting up a VPN on Linux. Hopefully, this journey has shed light on the critical importance of online privacy and equipped you with the knowledge and skills to secure your internet connection.
This article covered a lot of ground, from choosing the right VPN provider to configuring your VPN connection using different methods like Open VPN, Network Manager, and Wire Guard. We also discussed how to test your VPN connection to ensure that it's working correctly and how to troubleshoot common VPN issues. Finally, the option of setting up a VPN router was presented, extending protection to all devices connected to your network.
With the increasing threats to online security and privacy, taking proactive steps to protect your data is more important than ever. A VPN is a powerful tool that can help you reclaim your online privacy, bypass geo-restrictions, and protect your data from hackers and surveillance.
Now that you're armed with this knowledge, it's time to take action! Choose a VPN provider that meets your needs, configure your VPN connection on your Linux system, and start browsing the internet with confidence and peace of mind.
Ready to take control of your online privacy? Start setting up your VPN on Linux today!
Remember, the internet is a vast and sometimes dangerous place. By taking the time to set up a VPN, you're taking a significant step towards protecting yourself and your data. Stay safe out there, friends! Feel free to experiment further by researching more about Linux VPN or online security.
And that's a wrap! Go forth and browse securely!
Post a Comment for "Setting Up a VPN on Linux: Secure Your Internet Connection"
Post a Comment